ShareX
Learn how to set up ShareX to upload images directly to your S.I.M.P instance.
ShareX is a popular open-source screenshot and file sharing tool for Windows. You can configure ShareX to upload screenshots and files directly to your self-hosted S.I.M.P instance using its custom uploader feature.
Try it out!
Want to test S.I.M.P with ShareX before self-hosting?
- Follow the steps below to set up ShareX.
- As the host use
https://demo.usesimp.app/api/upload - Use the demo upload_key
9bQ&iQSsSJA@N!Ca
Please note: All files uploaded to the demo instance are automatically deleted every 10 minutes.
Step 1: Find Your S.I.M.P Upload Key
To allow ShareX to upload images, you need the upload key defined in your S.I.M.P config.yaml file.
The upload key is set in your config.yaml file under the upload_key field.
Copy this value to use as your API key in ShareX.
Step 2: Create a Custom Uploader in ShareX
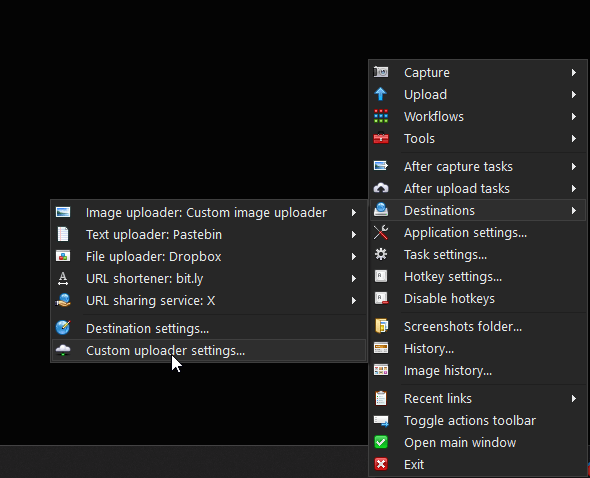
- Open ShareX.
- Go to Destinations > Custom uploader settings.
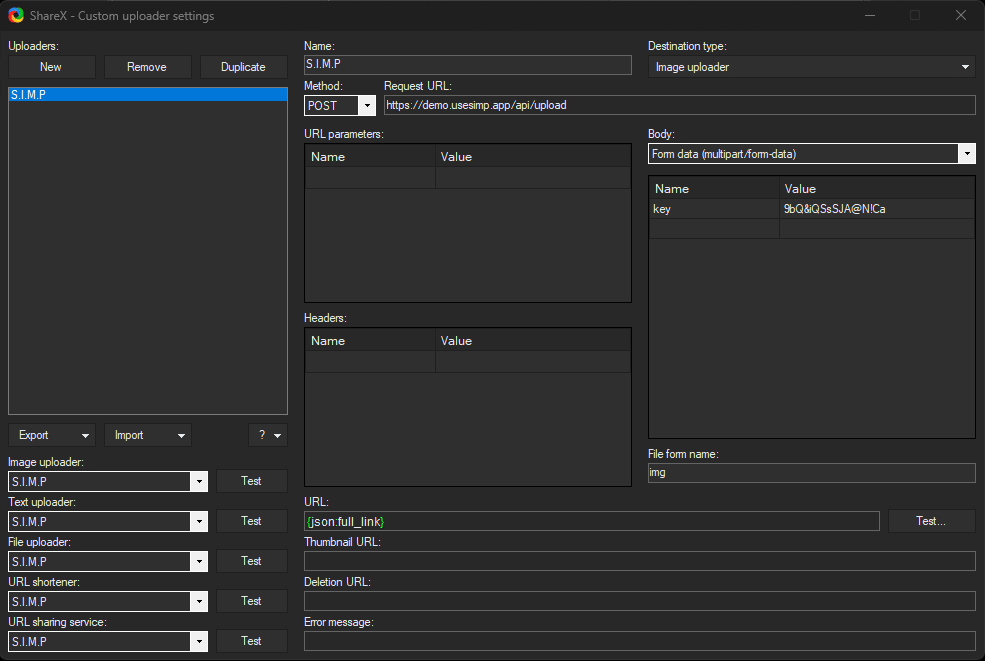
- Click New to create a new uploader.
- Set the Method to
POST. - Set the Request URL to your S.I.M.P upload endpoint, e.g.:
- Under Body, select
Multipart/form-dataand add a parameter:- Name:
key - Value:
upload_keyfrom step above
- Name:
- Set the URL to
{json:full_link}, this will be used to parse the image URL from the JSON response.

Step 3: Test the Uploader
- Click Test in the ShareX custom uploader window.
- If configured correctly, you should see a successful upload and receive a direct image URL.
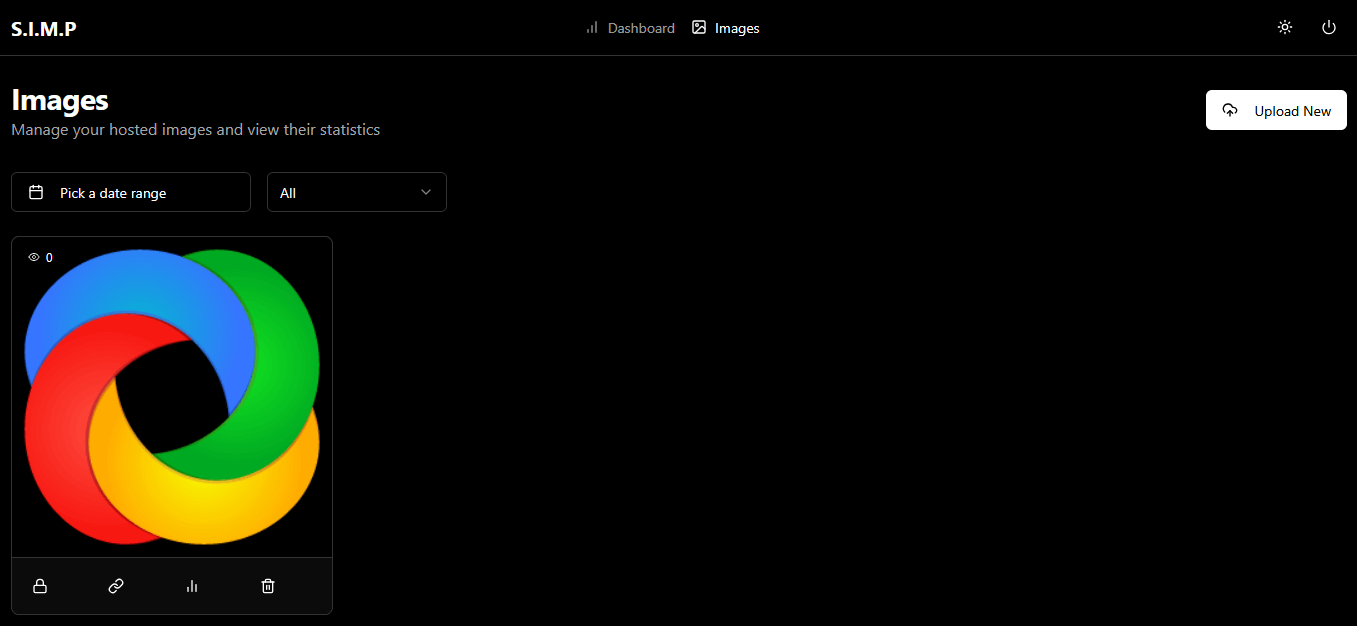
Step 4: Verify the Upload in the S.I.M.P Dashboard
- Open your S.I.M.P dashboard in your browser.
- Navigate to the Images tab.
- You should see the ShareX logo listed as a newly uploaded image—this confirms your test upload was successful.
Step 5: Final Steps
Now that your custom uploader is working, let’s make sure your ShareX workflow is as smooth as possible.
-
Set as Default Uploader
- In ShareX, go to Destinations > Image uploader.
- Select your newly created S.I.M.P uploader from the list. This ensures all future image uploads will use your S.I.M.P instance by default.
-
Configure Post-Upload Actions
- Go to After upload tasks in ShareX settings.
- Make sure Copy URL to clipboard is enabled. This way, every time you upload an image, the direct link will be automatically copied and ready to paste.
- Optionally, you can also enable Open URL if you want to preview uploads instantly.
-
Test Your Workflow
- Take a screenshot using ShareX.
- After uploading, try pasting (Ctrl+V) in your browser or chat app—the image URL should be ready to go.
- Visit the URL to confirm your image is accessible.
-
Enjoy Seamless Uploads!
- With these steps complete, you can now quickly upload screenshots and files from ShareX directly to your S.I.M.P instance, with the link instantly available for sharing.
Troubleshooting
- Ensure your S.I.M.P instance is accessible from your computer.
- Double-check your
upload_keyand endpoint URL. - Check S.I.M.P server logs for any errors if uploads fail.